*** Please see our CLASSES & EVENTS listings below. ***
EVENTS
are held at various locations and can include presentations and/or
offer stained glass & mosaic pieces for sale. The majority of our CLASSES are held at our studio at 81 Mill Street in Springfield MA. We have plenty of off-street lighted parking with security cameras. Entry does require a walk down a flight of stairs. CLASSES generally meet weekly and start at 6pm on weeknights & various times on weekends and run for +-3 hours (see SCHEDULE for class durations & prices). Classes are also held at various locations in surrounding towns (see below). To allow us to provide the required attention to all students, most classes have a 6 student maximum and a 2 student minimum(ADVANCED - LAMPS runs with single students if required). SPECIAL CLASSES & PRIVATE CLASSES are available as well (contact us for more info). If you have any questions please CONTACT US at (413) 562-4740 (Voice/Text) or via email at training@glassvisions.biz. Thanks for your interest!
CLASS payment is expected when you register via cash, check or credit card. We prefer cash or check but cards can be used if needed (5% fee). For STUDIO CLASSES we'll also allow payment per class on a limited basis with the first CLASS payment due when you register. MONEY-BACK GUARANTEE FOR ALL CLASSES IF *NOT* SATISFIED!! Please CONTACT US to register or check EventBright.
** Date/times for ALL STUDIO CLASSES can be modified as needed. If you want to attend a class on a different date/time, please CONTACT US and we'll do our best to get one scheduled for you.
NOTE THAT ALL CLASSES HELD AT MAKE-IT SPRINGFIELD and our STUDIO MUST BE REGISTERED FOR VIA EventBright(to register for individual classes either search for the class on EventBright OR select the --REGISTER-- link in class description). Please follow website links below to register for OTHER LOCATIONS. Contact us directly to register for STUDIO CLASSES which don't have an EventBright --REGISTER-- link provided. Contact us for answers to any questions. THANKS!
******************************************************************************************** Training events are held at the following locations. If instructions in the class listings don't provide specific registration information, please see location website or contact them directly. Any questions, please contact us at 413-562-4740 Voice/Text or via email at info@glassvisions.biz. MAKE-IT SPRINGFIELD 286 Bridge Street, Springfield, MA (413) 455-0663 email:makeitspringfield@gmail.com website:https://makeitspringfield.org/
$25- (MAKE-IT) ONE 2-hr class 10 Students MAX per class -- Sign Up Early!!
Sunday APRIL 27 :: Noon - 2pm (MAKE-IT) --REGISTER-- Sunday MAY 25 :: Noon - 2pm (MAKE-IT) --REGISTER--
Join Glass
Visions for an
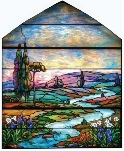
introduction to the BEAUTY and HISTORY of Stained Glass Art! Humans have used & produced
glass for thousands of years and it's been a main art form for 1200+
years. From the beautiful, colorful and wide scoping lead-came glass
construction used in Cathedrals beginning around 1000 to the amazing Opalescent glass
creations produced by the Tiffany Studios using the copper-foil
technique starting in the late 1880's, the historical significance of glass art is truly amazing. We'll provide an overview
of the copper-foil technique and you'll get some HANDS-ON
TIME to try glass cutting,
grinding, foiling and soldering. Come feast your eyes on some great
images of glass art and gain a
basic understanding of the Stained Glass Art Form and how
glass art projects are created. $10 discount provided for students who continue onto our full BEGINNING STAINED GLASS class. Hope to see you there!
120-min TOTAL -- 90-min PowerPoint Presentation + 30-min HANDS-ON
$60- (HITCHCOCK) ONE4 hr class $58- (MAKE-IT) ONE 3.5 - 4 hr class $60- (WOW) ONE4 hr class
6 Students MAX per class - SIGN UP EARLY!! If class is FULL and you still want to attend, please CONTACT US
Please join us for our SPRING STAINED GLASS SUNCATCHER classes! This class is for beginner/intermediates
where you'll get a complete introduction to the copper-foil stained glass
construction process and build a small SPRING themed SUNCATCHER to take
home. You'll have some practice time to get basic experience with glass selection, glass cutting, grinding, foiling, soldering and finishing
techniques. You'll pick one of our 4+ SPRING SUNCATCHER patterns for
your class project. For pattern possibilities think spring flowers, emerging leaves, bird life and warm sunshine. We also have a couple easier
geometric patterns available that can be done in warmer colors &
textures. We'll be available to help as needed. At the end you'll get to
take home your project with a suction cup holder to display your work in a window so you can enjoy the spring beauty you created! ALL needed glass & supplies are included in the class cost. This class also gets you ready to take our full 15 hr BEGINNING STAINED GLASS class if you want to continue learning the stained glass art form ($10 discount provided!). Come join us for a great stained glass learning experience!
$45- (HITCHCOCK) ONE3hr class $45- (MAKE-IT) ONE3hr class $60- (WOW) ONE3hr class 8 Students MAX per class -- Sign Up Early
Monday APRIL 28 ::6 - 9pm (Hitchcock) (413) 245-9977 Wednesday JUNE 18 ::6 - 9pm(Hitchcock) (413) 245-9977
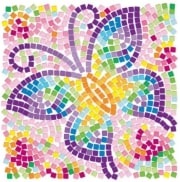
Mosaics are one of the oldest art forms humans created and we have examples dating
over 5000 years old! Mosaics can be made from just about any type of material
including pebbles, seashells, gems, ivory, glass and ceramic tile. We’ll take a quick
look at the history of Mosaics and walk thru the construction process and then you’ll
create a SIMPLE MOSAIC COASTER PROJECT using glass & ceramic tile.
The basic Mosaicconstruction process is fairly simple. A hard base is used to build your Mosaic
project upon which supports the glass/tile and grout. First a TEMPLATE IS CREATED showing the
outline of the design to be created and this is transferred to your base. Then the MATERIALS ARE
SELECTED to show your view of the project using different material colors & textures. You then
BREAK & NIP YOUR MATERIALS into piece shapes that will bring out your artistic vision. You ATTACH
YOUR PIECES to the base using a glue adhesive. We’ll be using No Days Mosaic Adhesive, which
uses heat to allow it to set quickly so grouting can be done immediately. A GROUT IS APPLIED
between the pieces which adheres everything together and helps smooth the surface. GROUT can be
colored to help enhance the artistic look of your project. And finally a SEALANT CAN BE APPLIED
to help protect the grout lines and your materials from moisture. There are lots of ways to embellish
the artistic look of Mosaic projects and we’ll discuss some of these ideas. Lots to learn but we’re here
to guide you all the way through!
Come join us for a fun introduction to Mosaics and how to create them and take home your own
Mosaic coaster project!
$45- (HITCHCOCK) ONE3hr class $35- (MAKE-IT) ONE3hr class $50- (WOW) ONE3hr class
8 Students MAX per class -- Sign Up Early
CONTACT US!
Would you like to learn the art of Paper Making? Paper was
first created over 2000 years ago by Ts’ai Lun, an official
attached to the Imperial court of China, who created a sheet of paper
using mulberry and other bast fibers along with fishnets, old rags,
and hemp waste. The history of papermaking is quite amazing and has
helped civilization grow & expand through the centuries. Can
you imagine a world without paper products today?
The
cell walls of all plants contain cellulose fibers,
an organic material with high strength and durability which
makes up one-third of the structural material of annual
plants and about one-half that of perennial
plants. Until the introduction of wood pulp in 1843 the prime
source of paper making ingredients were recycled textiles like
cotton, hemp and linen along with pure plant materials. The fibers
combine to give paper a strong & durable smooth surface and the
ability to soak up ink to allow it to maintain words and images.
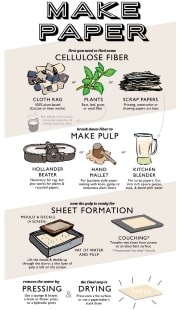
The basic papermaking process is fairly straightforward and can be
done by hand using both recycled materials and direct plant material
and simple tools. First you need CELLULOSE FIBER which can be
obtained from cloth rag, plants and scrap papers. Our focus will be
the use of recycled papers and cloth that would otherwise head to
landfills which is great for our world! Then a PULP IS MADE
by placing the fiber into a blender and blending well. This breaks
up the fiber and allows it to tightly bond with the other included
fibers to provide the PULP needed to create sheets. Interesting
items like different colored recycled papers, dried flowers, glitter,
etc. can be added to give your paper additional charm. Next we FORM
SHEETS using a MOLD & DECKLE and a process called COUCHING
(coo-ching). Our paper sheets are finished by PRESSING &
DRYING. We’re here to guide you through this process so you’ll
end up with great looking paper sheets at the end!
This is a basic introduction to paper making. The
paper we create will be somewhat rough and wavy but can have very
nice looks for writing, cards and a base for drawing
and painting. Come learn this amazing process and have lots
of fun making your own paper from recycled materials that is yours to keep! ALL: 180-min TOTAL -- 20-min PRESENTATION + 160-min HANDS-ON
*ALL CLASSES CAN BE SCHEDULED AT OTHER TIMES IF NEEDED ... CONTACT US!
** Following classes scheduled based on student class project progress.
CONTACT US!
** Following classes scheduled based on student class project progress.
CONTACT US!
** Following classes scheduled based on student class project progress.
CONTACT US!
CONTACT US!
CONTACT US! * Class can also be SCHEDULED ANYTIME and runs for 1 - 4 students. CONTACT US!!
Max Class Size: 6 (2 Min)
Join us for a basic introduction to copper-foil stained glass construction. We'll provide a wealth of informationn about stained glass art including its history, designs, types, stained glass details, equipment and construction techniques. You'll also have an opportunity to try glass cutting, grinding, foiling & soldering and see a few actual pieces in construction. This is a great class to see what stained glass art is all about and/or to help you make a decision about taking our BEGINNING STAINED GLASS class. The goal is to provide students with an introductory overview of stained glass art and how copper-foil projects are constructed.
** If you take this class and then enroll in
BEGINNING STAINED GLASS (within 2 months), we'll provide a $10 DISCOUNT bringing the BEGINNING STAINED GLASS class cost to just $185!
Max Class Size:8 (3 Min)
Mosaics are one of the oldest art forms created and we have examples dating
over 5000 years old! Mosaics can be made from just about any type of material
including pebbles, seashells, gems, ivory, glass and ceramic tile. In this class
we’ll take a quick look at the history of Mosaics and then you’ll get a chance to
create a simple Mosaic project using glass & ceramic tile.
The basic Mosaic construction process is fairly simple. First a TEMPLATE IS CREATED showing the
outline of the item to be created. Then the MATERIALS ARE SELECTED to show your view of the
item using different colors & textures. A hard base is used to build your Mosaic project upon. You
then BREAK & NIP your materials into piece shapes that will bring out your artistic vision. You
ATTACH YOUR PIECES to the backing using a glue adhesive. A GROUT IS APPLIED between the
pieces which adheres everything together and provides a smooth surface. And finally a SEALENT IS
USED to help protect the grout lines and your materials. There are lots of ways to embellish the artistic
look of Mosaic projects and we’ll discuss some of these ideas. Lots to learn but we’ll guide you all the
way through!
Come join us for a fun look at Mosaics and how to create them and take home your own Mosaic
project!
Max Class Size:8 (3 Min)
Would you like to learn the art of Paper Making? Paper was
first created over 2000 years ago by Ts’ai Lun, an official
attached to the Imperial court of China, who created a sheet of paper
using mulberry and other bast fibers along with fishnets, old rags,
and hemp waste. The history of papermaking is quite amazing and has
helped civilization grow & expand through the centuries. Can
you imagine a world without paper products today?
The
cell walls of all plants contain cellulose fibers,
an organic material with high strength and durability which
makes up one-third of the structural material of annual
plants and about one-half that of perennial
plants. Until the introduction of wood pulp in 1843 the prime
source of paper making ingredients were recycled textiles like
cotton, hemp and linen along with pure plant materials. The fibers
combine to give paper a strong & durable smooth surface and the
ability to soak up ink to allow it to maintain words and images.
The basic papermaking process is fairly straightforward and can be
done by hand using both recycled materials and direct plant material
and simple tools. First you need CELLULOSE FIBER which can be
obtained from cloth rag, plants and scrap papers. Our focus will be
the use of recycled papers and cloth that would otherwise head to
landfills which is great for our world! Then a PULP IS MADE
by placing the fiber into a blender and blending well. This breaks
up the fiber and allows it to tightly bond with the other included
fibers to provide the PULP needed to create sheets. Interesting
items like different colored recycled papers, dried flowers, glitter,
etc. can be added to give your paper additional charm. Next we FORM
SHEETS using a MOLD & DECKLE and a process called COUCHING
(coo-ching). Our paper sheets are finished by PRESSING &
DRYING. We’re here to guide you through this process so you’ll
end up with great looking paper sheets at the end!
This is a basic introduction to paper making. The
paper we create will be somewhat rough and wavy but can have very
nice looks for writing, cards and a base for drawing
and painting. Come learn this amazing process and have lots
of fun making your own paper from recycled materials that is yours to keep! ALL: 180-min TOTAL -- 20-min PRESENTATION + 160-min HANDS-ON
* NEED DIFFERENT DATES/TIMES or a PRIVATE CLASS? --- CONTACT US! * Contact us for a copy of the Class Syllabi (shown below).
Max Students: 4 (2 Min)
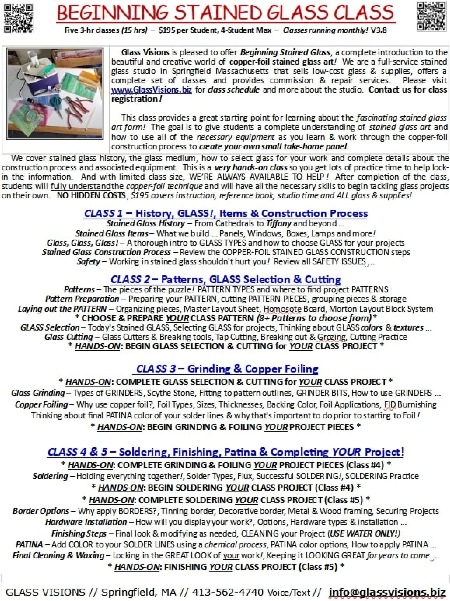
This class is meant for beginners or intermediates requiring a refresher and provides a complete exploration of the copper-foil stained glass process. We'll cover everything including history, how Tiffany made stained glass what it is today, types of stained glass projects, details about stained glass and how to select for your projects, patterns, equipment & safety, construction process and finishing techniques. Yes, there's lots to cover! Students will have an opportunity to practice glass cutting, grinding, foiling and soldering before working on their own project. The goal for this class is to give students a COMPLETE UNDERSTANDING of copper-foil stained glass art and how to use all of the necessary equipment as you learn & work through the stained glass construction process.
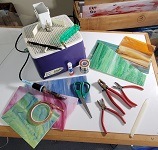
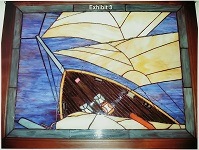
All glass & supplies are included in the cost of the class! There are NO hidden fees! Each student will select a small panel pattern, build it during class and take it home at the end. Classes have a PowerPoint presentation covering the material for the class and then studio time where students will put what they learned into action. And we're always available to show you what we covered and help you in any way we can!
All students receive a FREE electronic copy of my Stained Glass Reference Book that provides written instructions for all topics discussed in class.
Max Class Size: 4 (2 Min)
* Please note that this class DOESN'T NECESSARILY
RUN WEEKLY based on student progress on their projects. We'll work
together to schedule the classes as needed. This class is for intermediate stained glass artists that have worked in the construction process before and ideally have completed a few projects. We'll provide more details about 2D panel design & construction. As a refresher we'll also discuss many tips & tricks to help you choose better project designs and construct your projects more quickly and with more professionalism. We'll look at ways to improve your glass cutting, soldering and foiling with a good amount of time spent on patina processes and finishing techniques (i.e. border choices, sizing borders, and using panel holders to prominently show your work). The goal is to have you come out of this class with much more experience on how to create professional results for your panel projects.
Students are expected to have their own equipment and be able to work on their project at home between classes. Discounts will be provided if enrolled students need to purchase equipment. Panel supplies & glass ARE NOT included in the price of the class. Students are expected to bring their own supplies or purchase them here (discounts available). Each student should come to class with a pattern or they can select a pattern at the first class (pattern books will be available for FREE use). Please keep in mind that your chosen pattern MUST be something you feel comfortable completing in the 4 class weeks.
All students receive a FREE electronic copy of my Stained Glass Reference Book that provides written instructions for all topics discussed in class.
Max Class Size: 4 (2 Min)
* Please note that this class DOESN'T NECESSARILY RUN WEEKLY based on student progress on their projects. We'll work together to schedule the classes as needed.
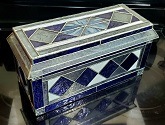
This class is for intermediate stained glass artists
that have worked in the construction process before and have
completed a few 2D projects. We'll introduce the different construction techniques required when building 3D boxes. We'll look at 3D box designs and how panels are connected. As a refresher we'll also quickly discuss some tips & tricks to help
you choose better project designs and construct your projects more
quickly and with more professionalism. We'll look at a few ways to improve
your glass cutting, soldering and foiling and review patina processes. There are only a few differences in 3D project construction process and we'll cover those and any required equipment to obtain good results. The goal for this class is to provide students with a solid understanding of & experience working on 3D stained glass projects.
Students are expected to have their own equipment and
be able to work on their project at home between classes. Discounts will be
provided if enrolled students need to purchase equipment. The majority of 3D project
supplies & glass ARE NOT included in the price of the class. We will provide supplies for any construction techniques that are new and require some hands on training to become ready to tackle your own project. Students are expected to bring their own supplies for their project or purchase them here (discounts available) and/or from other vendors.
Students may bring a 3D box project pattern with them to class or they can select a pattern at the first class (pattern books available for FREE use).
Please keep in mind that your chosen pattern MUST be something you feel
comfortable completing in the 4 class weeks. Since this is most likely
your first exploration of 3D box creation, try to keep your pattern
choice fairly simple (please talk to us early if you have something very detailed). Please remember, this class is more about LEARNING THE PROCESS than creating a masterpiece!
Max Class Size: 4 (2 Min)
* Please note that this class DOESN'T NECESSARILY
RUN WEEKLY based on student progress on their projects. We'll work
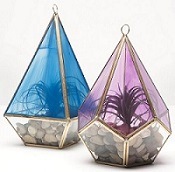
together to schedule the classes as needed. TERRARIUMS are a great option for building interesting and useful 3D stained glass projects! These can be small and fairly simple or extremely complex with designs including many different levels utilizing a multitude of glass types and filigree to give them an awesome artistic look. The best part is TERRARIUMS are so useful to help grow flowers and plants year-round in your home. This class will show you the basics and allow you to push your artistic skills as you make decisions about the best designs & glass types to help show your TERRARIUM in the best light. Since different plants require different light levels, it's best to think a bit about what you want to grow prior to building a new TERRARIUM. The goal for this class is to give intermediate students a solid understanding of the construction process required to put a TERRARIUM together and make it watertight.
Students are expected to have their own
equipment and be able to work on their TERRARIUM at home between
classes. Discounts will be provided if enrolled students need to
purchase equipment. Students will need to supply glass & supplies
for their TERRARIUM and we will offer special discounts on any items purchased from us.
We have several pattern options available and we'll review different TERRARIUM pattern possibilities in the first class. We also have several different TERRARIUM pattern books available (FREE use for students) and we'll review all of this so students can make their pattern decisions. It is also possible to design your own, however, that will only be briefly discussed in this class. If you have a specific TERRARIUM
pattern that you would like to do, by all means, bring it along and
we'll help you understand any building issues and guide you in its
construction. Please remember, the goal for this class is to help you LEARN THE PROCESS, so plan to keep your design choices fairly simple so you can gain experience doing TERRARIUM building and then be able to move onto more advanced designs later.
Just a note, generally students will NOT be able to make enough progress weekly to warrant the class running each week. We will adjust the schedule as needed based on how each student is progressing.
Max Class Size: 4 (2 Min)
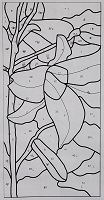
Our Pattern Design class will teach you how to design your own stained glass patterns. This is an intermediate class for students that have full control of the stained glass construction process and have built several projects. Most of the class applies to pattern design in mediums other than glass as well. There are many different approaches to creating your own patterns and in this class we'll cover several different options from manual pencil & paper to computer design creation (using Rapid Resizer Designer). In addition, there are quite a few things that must be kept in mind as you create patterns and we'll introduce students to the main elements that will help you to create designs that can be effectively built. This includes concepts like ensuring your pieces can actually be cut from glass, proper pattern sizing, border options, printing options, and including flow lines, piece group identifiers and numbers on your pattern. The goal of this class is to help students effectively design their own patterns that can be successfully constructed in glass.
Students will work on their own pattern creation throughout class and we're here to help ensure it is done in a manner that will allow construction (expect to go through several iterations). Actual construction of the panel is NOT part of this class but basic
help will be given to students who decide to build their pattern after
the class. The bulk of the class will be spent reviewing all of the
class concepts via PowerPoint presentations and working as a team to
discuss ideas and options. As a bonus, glass & equipment discounts
will be provided for students taking the class.
All students will receive an electronic version of my Stained Glass Design Creation book which provides a written guide to everything presented in the class.
Max Class Size: 4 (1 Min)
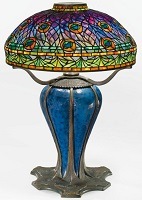
This class is for intermediate/advanced stained glass artists
that have full control of the construction process and have
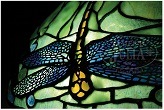
completed several 2D and/or 3D projects. We'll start by discussing the visual layout and glass used in Tiffany lamps and look at many different images of actual Tiffany lamps (like the Peacock lamp shown to the left) to give you some ideas about how the builders approached each design. The next topic explored will be lamp bases and the large amount of options available. Finally the complete construction process used for creating lamps based on the Odyssey System will be fully explored. There is another method called the Worden System and we'll quickly discuss this and we'll show the differences & potential issues.
Glass selection and layout are the most
important requirements for obtaining good lamp results and we'll cover all the details. We'll look at the wide spectrum of handmade glass types available with a focus on some of the more useful types for lamp work including mottled opalescent, dichro and fracture/streamer. To help lock in glass selection and layout methods, we'll examine several of Tiffany's lamps and discuss how the builders approached their glass selection choices. Many of Tiffany's designs (including the Dragonfly,
Fish, Poppy, Apple Blossom, Trumpet Vine, Grape & Wisteria) make use
of metal filigree to help provide additional detail. We'll discuss how
to use filigree correctly. We'll also fully review the Odyssey lamp construction process and give details on how to successfully build your lamps. You'll also get some practice time so you can gain experience with any of the specialized techniques. Finally we'll discuss FINISHING TECHNIQUES and the multitude
of patina finishes available including the highly desirable Tiffany Green patina finish. The
goal of this class is for students to gain a complete understanding of
how the Odyssey System works and to build a lamp using their construction process.
Students are expected to have their own equipment and
be able to work on their project at home between classes. Discounts will be
provided if enrolled students need to purchase equipment. Students are expected to bring their own glass & supplies for their
project or purchase them from us (discounts available).
Some discussion about project patterns is required. We have several of the simpler Odyssey molds & patterns available that you can use during the class if desired ($40 fee). Or you can purchase your own Odyssey mold & pattern at discounted prices from us or from other vendors. However, only a few of the available Odyssey patterns are really a good choice for your first introduction to lamp creation. I highly recommend that you work with one of our available pattern/molds since these are appropriate for this class and will cost you considerably less and you will have a much better chance of getting it completed in a timely fashion. Please let us know about your pattern thoughts when you sign-up so we can provide additional information.
THIS CLASS CAN BE RUN FOR *INDIVIDUAL* STUDENTS. Regarding the class schedule, this is a 4 session class, however it will most likely NOT be possible for you to make enough progress each week to have your class run weekly. We'll adjust the schedule as needed based on your progress.


 Join Glass
Visions for an
introduction to the BEAUTY and HISTORY of Stained Glass Art! Humans have used & produced
glass for thousands of years and it's been a main art form for 1200+
years. From the beautiful, colorful and wide scoping lead-came glass
construction used in Cathedrals beginning around 1000 to the amazing Opalescent glass
creations produced by the Tiffany Studios using the copper-foil
technique starting in the late 1880's, the historical significance of glass art is truly amazing. We'll provide an overview
of the copper-foil technique and you'll get some HANDS-ON
TIME to try glass cutting,
grinding, foiling and soldering. Come feast your eyes on some great
images of glass art and gain a
basic understanding of the Stained Glass Art Form and how
glass art projects are created. $10 discount provided for students who continue onto our full BEGINNING STAINED GLASS class. Hope to see you there!
Join Glass
Visions for an
introduction to the BEAUTY and HISTORY of Stained Glass Art! Humans have used & produced
glass for thousands of years and it's been a main art form for 1200+
years. From the beautiful, colorful and wide scoping lead-came glass
construction used in Cathedrals beginning around 1000 to the amazing Opalescent glass
creations produced by the Tiffany Studios using the copper-foil
technique starting in the late 1880's, the historical significance of glass art is truly amazing. We'll provide an overview
of the copper-foil technique and you'll get some HANDS-ON
TIME to try glass cutting,
grinding, foiling and soldering. Come feast your eyes on some great
images of glass art and gain a
basic understanding of the Stained Glass Art Form and how
glass art projects are created. $10 discount provided for students who continue onto our full BEGINNING STAINED GLASS class. Hope to see you there!
 Please join us for our SPRING STAINED GLASS SUNCATCHER classes! This class is for beginner/intermediates
where you'll get a complete introduction to the copper-foil stained glass
construction process and build a small SPRING themed SUNCATCHER to take
home. You'll have some practice time to get basic experience with glass selection, glass cutting, grinding, foiling, soldering and finishing
techniques. You'll pick one of our 4+ SPRING SUNCATCHER patterns for
your class project. For pattern possibilities think spring flowers, emerging leaves, bird life and warm sunshine. We also have a couple easier
geometric patterns available that can be done in warmer colors &
textures. We'll be available to help as needed. At the end you'll get to
take home your project with a suction cup holder to display your work in a window so you can enjoy the spring beauty you created! ALL needed glass & supplies are included in the class cost. This class also gets you ready to take our full 15 hr BEGINNING STAINED GLASS class if you want to continue learning the stained glass art form ($10 discount provided!). Come join us for a great stained glass learning experience!
Please join us for our SPRING STAINED GLASS SUNCATCHER classes! This class is for beginner/intermediates
where you'll get a complete introduction to the copper-foil stained glass
construction process and build a small SPRING themed SUNCATCHER to take
home. You'll have some practice time to get basic experience with glass selection, glass cutting, grinding, foiling, soldering and finishing
techniques. You'll pick one of our 4+ SPRING SUNCATCHER patterns for
your class project. For pattern possibilities think spring flowers, emerging leaves, bird life and warm sunshine. We also have a couple easier
geometric patterns available that can be done in warmer colors &
textures. We'll be available to help as needed. At the end you'll get to
take home your project with a suction cup holder to display your work in a window so you can enjoy the spring beauty you created! ALL needed glass & supplies are included in the class cost. This class also gets you ready to take our full 15 hr BEGINNING STAINED GLASS class if you want to continue learning the stained glass art form ($10 discount provided!). Come join us for a great stained glass learning experience!
 Mosaics are one of the oldest art forms humans created and we have examples dating
over 5000 years old! Mosaics can be made from just about any type of material
including pebbles, seashells, gems, ivory, glass and ceramic tile. We’ll take a quick
look at the history of Mosaics and walk thru the construction process and then you’ll
create a SIMPLE MOSAIC COASTER PROJECT using glass & ceramic tile.
Mosaics are one of the oldest art forms humans created and we have examples dating
over 5000 years old! Mosaics can be made from just about any type of material
including pebbles, seashells, gems, ivory, glass and ceramic tile. We’ll take a quick
look at the history of Mosaics and walk thru the construction process and then you’ll
create a SIMPLE MOSAIC COASTER PROJECT using glass & ceramic tile.
 Would you like to learn the art of Paper Making? Paper was
first created over 2000 years ago by Ts’ai Lun, an official
attached to the Imperial court of China, who created a sheet of paper
using mulberry and other bast fibers along with fishnets, old rags,
and hemp waste. The history of papermaking is quite amazing and has
helped civilization grow & expand through the centuries. Can
you imagine a world without paper products today?
Would you like to learn the art of Paper Making? Paper was
first created over 2000 years ago by Ts’ai Lun, an official
attached to the Imperial court of China, who created a sheet of paper
using mulberry and other bast fibers along with fishnets, old rags,
and hemp waste. The history of papermaking is quite amazing and has
helped civilization grow & expand through the centuries. Can
you imagine a world without paper products today? 


 Max Class Size: 6 (2 Min)
 Max Class Size: 8 (3 Min)

 Max Students: 4 (2 Min)
 Max Class Size: 4 (2 Min)
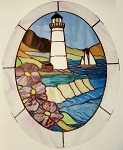 Students are expected to have their own equipment and be able to work on their project at home between classes. Discounts will be provided if enrolled students need to purchase equipment. Panel supplies & glass ARE NOT included in the price of the class. Students are expected to bring their own supplies or purchase them here (discounts available). Each student should come to class with a pattern or they can select a pattern at the first class (pattern books will be available for FREE use). Please keep in mind that your chosen pattern MUST be something you feel comfortable completing in the 4 class weeks.
 Max Class Size: 4 (2 Min)
 Students are expected to have their own equipment and
be able to work on their project at home between classes. Discounts will be
provided if enrolled students need to purchase equipment. The majority of 3D project
supplies & glass ARE NOT included in the price of the class. We will provide supplies for any construction techniques that are new and require some hands on training to become ready to tackle your own project. Students are expected to bring their own supplies for their project or purchase them here (discounts available) and/or from other vendors.
Students are expected to have their own equipment and
be able to work on their project at home between classes. Discounts will be
provided if enrolled students need to purchase equipment. The majority of 3D project
supplies & glass ARE NOT included in the price of the class. We will provide supplies for any construction techniques that are new and require some hands on training to become ready to tackle your own project. Students are expected to bring their own supplies for their project or purchase them here (discounts available) and/or from other vendors.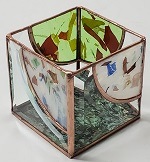 Students may bring a 3D box project pattern with them to class or they can select a pattern at the first class (pattern books available for FREE use).
Please keep in mind that your chosen pattern MUST be something you feel
comfortable completing in the 4 class weeks. Since this is most likely
your first exploration of 3D box creation, try to keep your pattern
choice fairly simple (please talk to us early if you have something very detailed). Please remember, this class is more about LEARNING THE PROCESS than creating a masterpiece!
Students may bring a 3D box project pattern with them to class or they can select a pattern at the first class (pattern books available for FREE use).
Please keep in mind that your chosen pattern MUST be something you feel
comfortable completing in the 4 class weeks. Since this is most likely
your first exploration of 3D box creation, try to keep your pattern
choice fairly simple (please talk to us early if you have something very detailed). Please remember, this class is more about LEARNING THE PROCESS than creating a masterpiece!
 Max Class Size: 4 (2 Min)
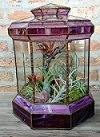 Students are expected to have their own
equipment and be able to work on their TERRARIUM at home between
classes. Discounts will be provided if enrolled students need to
purchase equipment. Students will need to supply glass & supplies
for their TERRARIUM and we will offer special discounts on any items purchased from us.
Students are expected to have their own
equipment and be able to work on their TERRARIUM at home between
classes. Discounts will be provided if enrolled students need to
purchase equipment. Students will need to supply glass & supplies
for their TERRARIUM and we will offer special discounts on any items purchased from us.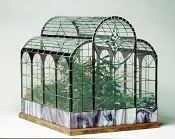 We have several pattern options available and we'll review different TERRARIUM pattern possibilities in the first class. We also have several different TERRARIUM pattern books available (FREE use for students) and we'll review all of this so students can make their pattern decisions. It is also possible to design your own, however, that will only be briefly discussed in this class. If you have a specific TERRARIUM
pattern that you would like to do, by all means, bring it along and
we'll help you understand any building issues and guide you in its
construction. Please remember, the goal for this class is to help you LEARN THE PROCESS, so plan to keep your design choices fairly simple so you can gain experience doing TERRARIUM building and then be able to move onto more advanced designs later.
We have several pattern options available and we'll review different TERRARIUM pattern possibilities in the first class. We also have several different TERRARIUM pattern books available (FREE use for students) and we'll review all of this so students can make their pattern decisions. It is also possible to design your own, however, that will only be briefly discussed in this class. If you have a specific TERRARIUM
pattern that you would like to do, by all means, bring it along and
we'll help you understand any building issues and guide you in its
construction. Please remember, the goal for this class is to help you LEARN THE PROCESS, so plan to keep your design choices fairly simple so you can gain experience doing TERRARIUM building and then be able to move onto more advanced designs later.
 Max Class Size: 4 (2 Min)
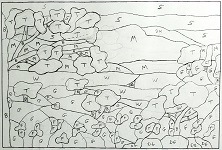 Students will work on their own pattern creation throughout class and we're here to help ensure it is done in a manner that will allow construction (expect to go through several iterations). Actual construction of the panel is NOT part of this class but basic
help will be given to students who decide to build their pattern after
the class. The bulk of the class will be spent reviewing all of the
class concepts via PowerPoint presentations and working as a team to
discuss ideas and options. As a bonus, glass & equipment discounts
will be provided for students taking the class.
Students will work on their own pattern creation throughout class and we're here to help ensure it is done in a manner that will allow construction (expect to go through several iterations). Actual construction of the panel is NOT part of this class but basic
help will be given to students who decide to build their pattern after
the class. The bulk of the class will be spent reviewing all of the
class concepts via PowerPoint presentations and working as a team to
discuss ideas and options. As a bonus, glass & equipment discounts
will be provided for students taking the class.
 Max Class Size: 4 (1 Min)
 Glass selection and layout are the most
important requirements for obtaining good lamp results and we'll cover all the details. We'll look at the wide spectrum of handmade glass types available with a focus on some of the more useful types for lamp work including mottled opalescent, dichro and fracture/streamer. To help lock in glass selection and layout methods, we'll examine several of Tiffany's lamps and discuss how the builders approached their glass selection choices. Many of Tiffany's designs (including the Dragonfly,
Fish, Poppy, Apple Blossom, Trumpet Vine, Grape & Wisteria) make use
of metal filigree to help provide additional detail. We'll discuss how
to use filigree correctly. We'll also fully review the Odyssey lamp construction process and give details on how to successfully build your lamps. You'll also get some practice time so you can gain experience with any of the specialized techniques. Finally we'll discuss FINISHING TECHNIQUES and the multitude
of patina finishes available including the highly desirable Tiffany Green patina finish. The
goal of this class is for students to gain a complete understanding of
how the Odyssey System works and to build a lamp using their construction process.
Glass selection and layout are the most
important requirements for obtaining good lamp results and we'll cover all the details. We'll look at the wide spectrum of handmade glass types available with a focus on some of the more useful types for lamp work including mottled opalescent, dichro and fracture/streamer. To help lock in glass selection and layout methods, we'll examine several of Tiffany's lamps and discuss how the builders approached their glass selection choices. Many of Tiffany's designs (including the Dragonfly,
Fish, Poppy, Apple Blossom, Trumpet Vine, Grape & Wisteria) make use
of metal filigree to help provide additional detail. We'll discuss how
to use filigree correctly. We'll also fully review the Odyssey lamp construction process and give details on how to successfully build your lamps. You'll also get some practice time so you can gain experience with any of the specialized techniques. Finally we'll discuss FINISHING TECHNIQUES and the multitude
of patina finishes available including the highly desirable Tiffany Green patina finish. The
goal of this class is for students to gain a complete understanding of
how the Odyssey System works and to build a lamp using their construction process. Students are expected to have their own equipment and
be able to work on their project at home between classes. Discounts will be
provided if enrolled students need to purchase equipment. Students are expected to bring their own glass & supplies for their
project or purchase them from us (discounts available).
Students are expected to have their own equipment and
be able to work on their project at home between classes. Discounts will be
provided if enrolled students need to purchase equipment. Students are expected to bring their own glass & supplies for their
project or purchase them from us (discounts available). Some discussion about project patterns is required. We have several of the simpler Odyssey molds & patterns available that you can use during the class if desired ($40 fee). Or you can purchase your own Odyssey mold & pattern at discounted prices from us or from other vendors. However, only a few of the available Odyssey patterns are really a good choice for your first introduction to lamp creation. I highly recommend that you work with one of our available pattern/molds since these are appropriate for this class and will cost you considerably less and you will have a much better chance of getting it completed in a timely fashion. Please let us know about your pattern thoughts when you sign-up so we can provide additional information.
 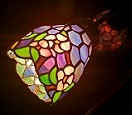 THIS CLASS CAN BE RUN FOR *INDIVIDUAL* STUDENTS. Regarding the class schedule, this is a 4 session class, however it will most likely NOT be possible for you to make enough progress each week to have your class run weekly. We'll adjust the schedule as needed based on your progress.